Understand PowerShell Integrated Scripting Environment (ISE)

One of the powerful tools in Windows Server 2012 and Windows 8 is the PowerShell Integrated Scripting Environment (ISE). The PowerShell ISE provides some great components. Specifically, it is the component required for the Out-Gridview output format.
This component provides GUI front end for PowerShell and is a nice tool to use to create and validate your PowerShell scripts.
Windows PowerShell ISE 3.0 is installed by default. To upgrade it to version 4.0, see Windows Management Framework 4.0 in the Microsoft Download Center.
Work with the PowerShell ISE
The PowerShell ISE is enabled by default on a Windows Server 2012 GUI installation. Working with the PowerShell ISE is just a matter of loading it:
- Navigate to the Server Manager
- Click Tools
- Click PowerShell ISE or PowerShell ISE (86), and you will see a screen similar to below

PowerShell ISE
The PowerShell ISE is broken into three panes. In the top pane, you can create and edit scripts. The bottom pane is the PowerShell Scripting window where you can enter and execute commands, just as you would do in a Command Prompt window. The third pane is the Command Add-on pane and is new to Windows Server 2012.
The true power of the PowerShell ISE tool is its ability to chain several of our PowerShell cmdlets together. All we need to do is type in our commands as we normally would, and then execute the script by pressing F5 key. The Windows PowerShell also gives us some minimal debugging tools to set breakpoints in our PowerShell script.
The Command Add-on pane is a new pane; it allows us to quickly find and create PowerShell cmdlets in a dialog box-style interface. The pane should be visible by default. If it’s not, we can open the Command Add-on from the View menu in the PowerShell ISE. With the command Add-on, we can filter commands by category and scroll through the list until we find the cmdlet we need. When we select cmdlet, we can then click Show Details and see all the parameters for that cmdlet.

We can then fill in all the values for the parameters in the cmdlet. When we are done, we can click either Insert or Copy button. If we click Insert, the completed cmdlet will be inserted in the command prompt area and we can then execute the cmdlet. If we click Copy, the cmdlet will be placed on the Clipboard; from there, we can paste it into the script pane or some other PowerShell editing tool. This exposes all the parameters for cmdlet and helps ensure that PowerShell does all it can for us.
The PowerShell 3.0 ISE has two powerful addition that make writing PowerShell scripts easier and faster. The first is Intellisense, something developers and IT Pros wanted for years. This feature is very similar to drop-down support in Visual Studio and assist you in the writing properly formatted PowerShell command.
In this below screen shot, we can see the example of IntelliSense in action. It provides support for properties, methods, cmdlet names, function names, and even parameters – all via a drop-down list as we type in our cmdlets.

The second addition to the ISE is the Integrated Script Snippets feature (snipped for short). Snippet are stored in the Integrated Scripting Environment (ISE) and were designed to help us learn PowerShell as well as write proper scripts. When we access the snippet, we can select from a list of script templates, select the appropriate template, and have a partially completed script inserted into the Script pane. The snippets are easy to access from within the ISE, press Ctrl+J or select Start Snippets from Edit menu.
See the screen shot below
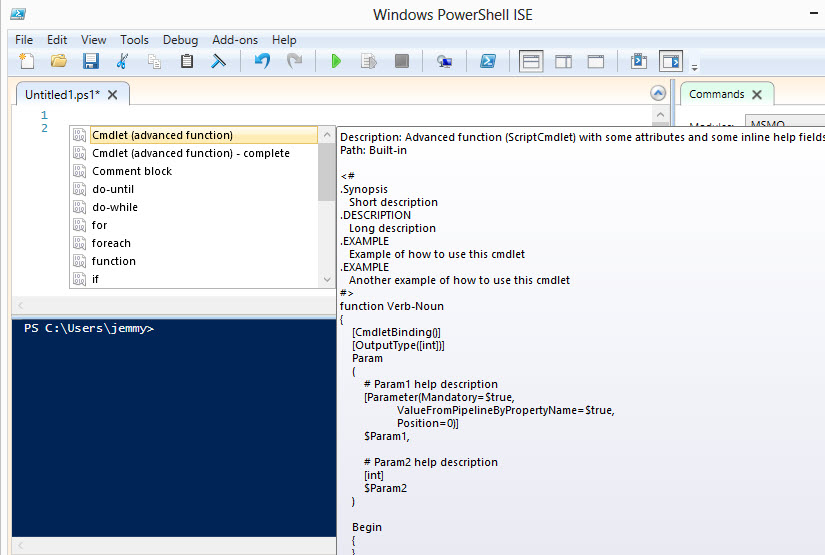
To view and learn more about a snippet, just click a cmdlet name, and we’ll see a script along with a description. To insert the snippet, either double-click the cmdlet name, or with the cmdlet name selected, press Enter.
By default, the ISE ships with several script snippets to make it easier to create the commonly used programing syntax patterns.
Leave a Reply
You must be logged in to post a comment.